There are few desserts that evoke the same sense of nostalgia and pure joy as a scoop of homemade vanilla ice cream. But not just any vanilla ice cream – we're talking about the kind your grandmother used to make, the kind that's so rich, so creamy, and so bursting with genuine vanilla flavor that it transports you back to simpler times. This is the magic of an old fashioned vanilla ice cream recipe, a timeless classic that, despite its luxurious taste, requires just five simple ingredients and a little love.
Forget the icy, artificial tasting versions you sometimes find; this recipe delivers a velvety, decadent experience that rivals, and often surpasses, even the best ice cream parlor offerings. It's more than just a dessert; it's a tradition, a memory in the making, and the perfect centerpiece for summer gatherings, holiday celebrations, or just a quiet evening treat.
Why "Old Fashioned" is Always Best: The Allure of Homemade Vanilla Ice Cream
What sets an "old fashioned" ice cream recipe apart from its modern counterparts? It largely comes down to the foundation: a meticulously crafted custard base. Unlike many commercial ice creams that rely on stabilizers and air whipped in for volume, a truly old fashioned version prioritizes pure, high-quality ingredients and a cooking process that yields an incredibly rich and dense texture. This isn't just a frozen dessert; it's an experience.
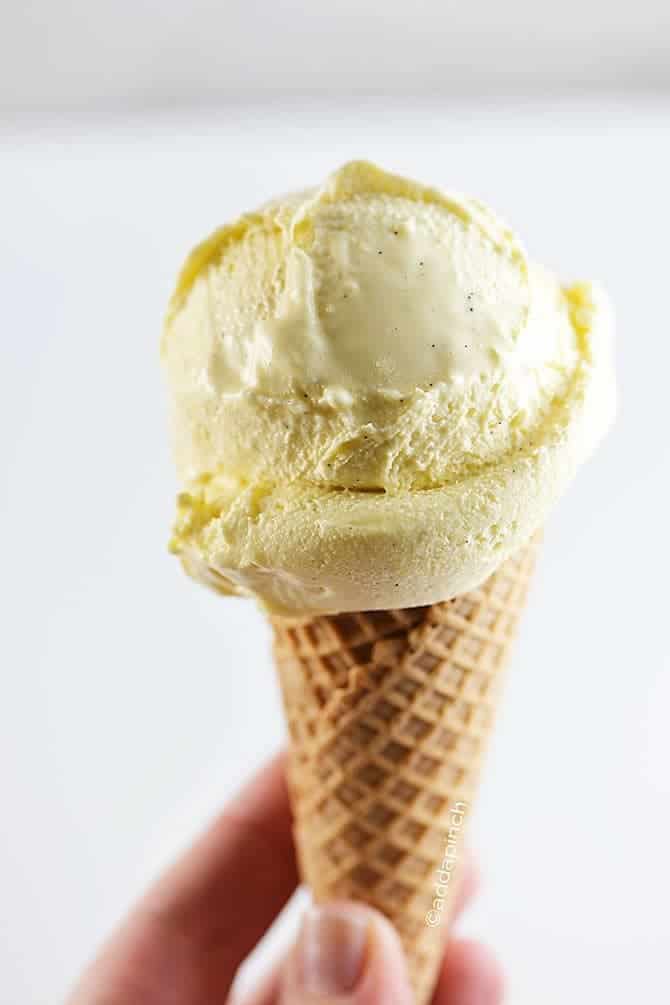
The charm of homemade vanilla ice cream lies in its simplicity and the depth of flavor that emerges from real dairy and genuine vanilla. You won't find any mysterious ingredients here, just honest goodness. This particular old fashioned vanilla ice cream recipe is famous for its smooth, almost pudding-like consistency that melts slowly and luxuriously on the tongue. Imagine those tiny, beautiful vanilla bean specks (even if you're using extract, the taste will suggest them!) adding both visual appeal and an aromatic punch.
For generations, families have gathered to churn homemade ice cream, making it a cherished summer tradition, especially in warmer climates where a refreshing, creamy treat is a welcome respite from the heat. The process itself often becomes a communal activity, fostering connection and creating lasting memories. While there are countless ice cream flavors out there, there's an undeniable gravitas to classic vanilla, serving as the perfect standalone indulgence or the ideal canvas for any topping imaginable. If you're looking for an ice cream that truly delivers on taste and nostalgia, you'll find that this creamy, old-fashioned custard type is the one. For more insights into creating the perfect parlor-quality treat at home, read our guide: Better Than Any Parlor: Make Old Fashioned Vanilla Ice Cream at Home.
The Secret to Silky Smoothness: A Custard Base Explained
The heart of this incredible old fashioned vanilla ice cream recipe is its rich custard base. This is what gives it that signature silky-smooth texture, preventing the formation of large ice crystals that can make other homemade ice creams feel grainy or icy. The process involves gently cooking egg yolks, sugar, and half-and-half until they thicken, creating a luscious foundation before the whipping cream and vanilla are introduced.
The egg yolks play a crucial role, not just for richness and color, but also as a natural emulsifier, helping to create a stable, creamy mixture. Cooking this mixture over a double boiler ensures gentle, even heat distribution, preventing the eggs from scrambling. This slow cooking allows the proteins in the eggs to thicken the mixture beautifully, much like making a delicate pastry cream.
Once thickened, the custard needs to be cooled thoroughly. This is a critical step; a well-chilled base churns more effectively, resulting in a smoother, firmer ice cream. Only after cooling are the whipping cream and vanilla extract stirred in. Adding the vanilla last preserves its delicate aromatic compounds, ensuring a vibrant, pure vanilla flavor in every spoonful. The whipping cream, with its higher fat content, contributes significantly to the final creamy texture and mouthfeel, making each scoop truly decadent.
Your 5-Ingredient Recipe for Old Fashioned Vanilla Ice Cream
Ready to make magic? Here’s your straightforward recipe for a truly unforgettable old fashioned vanilla ice cream.
Ingredients:
- 5 large egg yolks
- 2/3 cup granulated sugar
- 1 cup half-and-half
- 1 cup heavy whipping cream
- 2 teaspoons pure vanilla extract (or 1 tsp vanilla bean paste for visible specks)
Instructions:
- Prepare the Custard Base: In a medium heatproof bowl (or the top part of a double boiler), vigorously whisk together the egg yolks and sugar until the mixture is pale yellow and well blended. This aeration helps create a smoother custard.
- Begin Cooking: Pour the egg yolk mixture into the top of a double boiler set over simmering water (ensure the bottom of the bowl does not touch the water). Gradually stir in the half-and-half until fully combined.
- Thicken the Custard: Cook the mixture, stirring constantly, until it thickens enough to coat the back of a spoon. This typically takes 8-10 minutes. If you swipe your finger across the spoon and it leaves a clear path, it's ready. Important: Do not boil. The internal temperature should reach 160°F (71°C) to ensure the eggs are safely cooked.
- Cool the Base: Immediately remove the bowl from the heat. You can place the bowl into an ice bath for faster cooling, stirring occasionally, or simply allow it to cool completely to room temperature. Once cool, cover it and refrigerate for at least 4 hours, or preferably overnight, until it is thoroughly chilled. This chilling step is crucial for the best ice cream texture.
- Finish the Base: Once the custard base is fully chilled, stir in the whipping cream and pure vanilla extract until well combined.
- Churn the Ice Cream: Pour the mixture into the frozen canister of your ice cream maker. Process according to your manufacturer's instructions, typically for 20-30 minutes, until the ice cream is thick and firm, resembling soft-serve consistency.
- Freeze to Firm: Transfer the churned ice cream to an airtight container. Press a piece of parchment paper or plastic wrap directly onto the surface to prevent ice crystals from forming, then cover with a lid. Freeze for at least 2-4 hours, or until firmly set.
Tips for Perfection: Elevating Your Homemade Ice Cream Experience
Making truly exceptional homemade ice cream goes beyond just following the steps. Here are some pro tips to ensure your old fashioned vanilla ice cream recipe turns out perfectly every time:
- Quality Ingredients Matter: Since there are only five ingredients, the quality of each makes a significant impact. Use fresh, high-quality eggs, good dairy (preferably not ultra-pasteurized for the half-and-half and whipping cream, as it can sometimes affect texture), and always opt for pure vanilla extract. If you want those beautiful vanilla bean specks, consider using a good quality vanilla bean paste or scraping the seeds from half a vanilla bean into your custard.
- The Art of the Double Boiler: Patience is key when cooking the custard. Constant stirring prevents the egg yolks from curdling and ensures a smooth, even consistency. If you don't have a double boiler, a heatproof bowl set over a saucepan of simmering water works just as well.
- Thorough Chilling is Non-Negotiable: This is arguably the most important step after cooking the custard. The colder your base is before churning, the faster it will freeze and the smaller the ice crystals will be, resulting in a creamier texture. Don't rush it!
- Your Ice Cream Maker: Make sure your ice cream maker's bowl is frozen solid – usually at least 24 hours in the freezer. Overfilling the machine can lead to a less efficient churn, so always check your manufacturer's guidelines.
- Post-Churn Firming: After churning, the ice cream will have a soft-serve consistency. While delicious, transferring it to an airtight container and freezing it for a few more hours allows it to firm up to the perfect scoopable texture. Don't forget to press plastic wrap directly onto the surface to prevent freezer burn and keep it smooth.
- Serving Suggestions: This versatile vanilla ice cream is perfect on its own in a cone or bowl, but it also shines when paired with warm fruit pies, cobblers, brownies, or as the base for a magnificent sundae.
- Egg Safety Note: While the term "raw eggs" might be associated with some ice cream recipes, it's important to note that this specific recipe involves cooking the egg yolks to a safe temperature (160°F / 71°C), ensuring the custard is pasteurized and safe to consume.
For more cherished family recipes and techniques, explore Grandma's Best: Classic Old Fashioned Vanilla Custard Ice Cream.
Conclusion
There’s a profound satisfaction that comes with creating something truly delicious from scratch, especially when it evokes cherished memories and brings smiles to faces. This old fashioned vanilla ice cream recipe isn't just about dessert; it's about connecting with tradition, savoring simple pleasures, and making new memories. With just five ingredients and a little patience, you can create a rich, creamy, and undeniably decadent homemade vanilla ice cream that will become a beloved staple in your home. So go ahead, whip up a batch, and experience the timeless magic of truly authentic vanilla ice cream.
